I thought I’d start posting a few pictures of my (modest) progress on my wine cellar. Perhaps I’ll inspire someone, or perhaps someone will tell me I’m doing something wildly wrong.
The end result will be a cellar approximately 7’ x 9’, 7’ high, in my unfinished basement. With double-deep racking on one long wall and single-deep on the other wall, I’m aiming for about 1300-1500 bottle capacity. I’m sure someone will quickly tell me it’s not enough, which one day I hope it won’t be. But for now, it’s going to take me a while to fill it., as you can see from some of the modest racking I have in the corner of the pictures (plus OCB-Original Cardboard Boxes-of some wines).
I’ll post periodic project updates. This is a free time/weekends project, so pretty slow going, especially with some of the challenges presented by the space in an 80+ year old house (i.e., no right angles or flat surfaces).
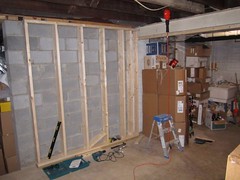
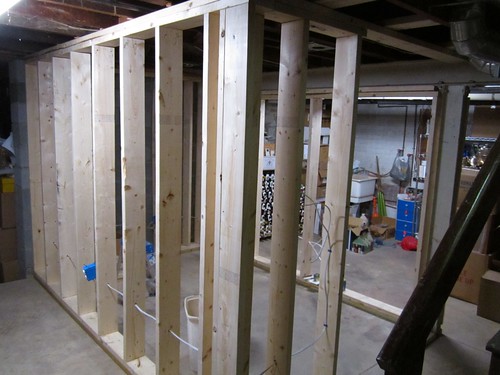
The first wall goes in. The concrete blocks are the end of the original house; on the other side is a new addition from a recent renovation. 2x6 construction to allow for ample insulation.
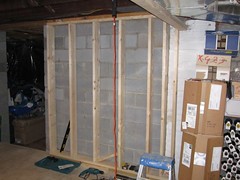
Two views. Note the white brick column on the right. It sticks out about 2 inches from the concrete block wall, requiring me to build around it.
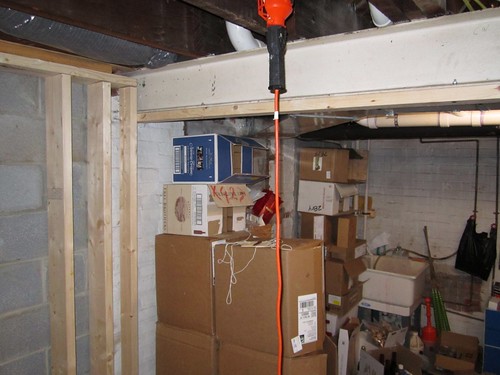
Another challenge: a steel support beam. I’m taking advantage of it and using it for one of the walls. You may be able to see the ductwork just on the other side of the beam. That’s why the cellar isn’t going to be any bigger. When the renovation was done, lots of plumbing, electric, and ductwork was hung below the floor joists, and it just wasn’t worth trying to box it in and get a barely 6-foot high ceiling.
I attached a 2x4 to the steel beam using 3 bolts and construction adhesive. Pretty sure it will survive any shear forces the wall is likely to see. Probably a lot stronger than the 2x6s screwed into the floor using cement screws (Tap-Con) and construction adhesive.
You can probably also tell there’s an additional challenge from all the junk in our basement. I’ve had to move things around to make room to work. Fortunately, once this is done we’ll be able to create some better organization with additional shelving. Wife approves.
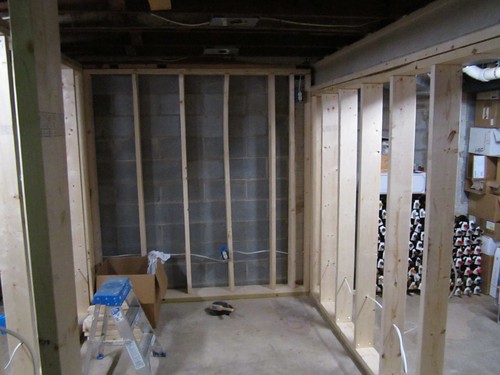
After a little more work, the walls are mostly complete:
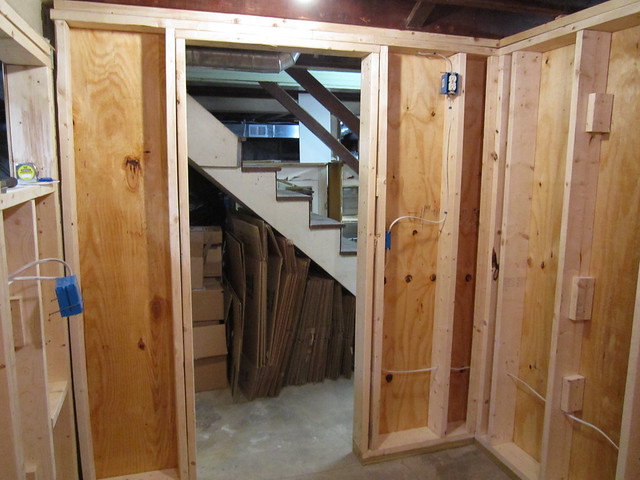
Looking in the (eventually) door:
An outside view, showing the door (on the right) and an open gap where the A/C will go in (waiting to finish the studs until I’ve bought the unit). You can see the wiring too. Added a couple of outlets for the outside walls in case we want to plug in a vacuum cleaner or other items. Basement doesn’t have enough outlets.
BTW, I’m wondering as much as you why that stud bowed so much on the back wall. I have photographic proof it wasn’t like that when I put it up. I’ll have to jam in a piece of 2x6 to straighten it out before putting up the walls.
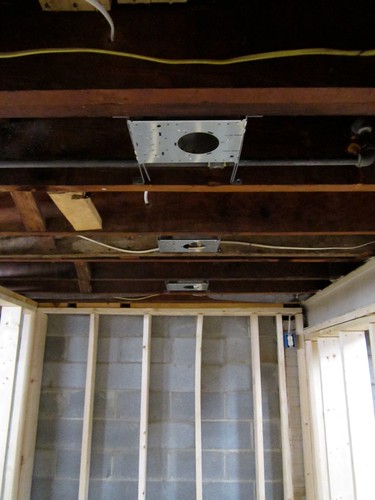
Here’s a shot of the ceiling. You can’t get a full appreciation for all of the challenges this presented, but between each joist from front to back are:
Existing wiring (basically open)
Gas pipe to stove
Drain pipe from sink
Supply pipes to sink
Open
Open
A/C duct
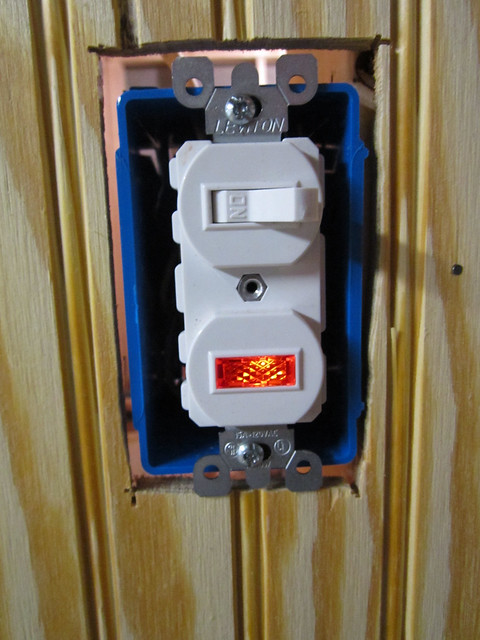
I had limited space in which to install the recessed lighting. Fortunately, the IC housing was just short enough to fit under the copper supply pipes and narrow enough to fit in the joists with the gas pipe. So 3 recessed lights (Par 20 bulbs). You can see the outlet in the upper right, which I’ll use for rope lighting if needed. There’s another one out of sight on the door wall on the left. All operated by switch from outside the door (using a pilot light switch that glows red if the lights are on).
One should really use pressure treated lumber in situations where it will be in direct contact with concrete, otherwise things are looking pretty good so far! I’m definitely jealous of your overall size…
Pressure treated bottom plates. The concrete blocks are not an exterior wall (and, because of the way the wall meets the floor, the wood doesn’t touch the concrete).
I’m planning to use foam. The challenge is going to be the ceiling.
I’m kind of have a mixed mind on a vapor barrier. My basement is dry, both in winter and summer (A/C gets down there even though the vents aren’t opened) and in looking at the temperature gradients along with the humidity I have in my house I don’t expect condensation to be a problem. Indeed, in the winter the moisture in the cellar is likely to be moving outward not inward. (It’s the same problem homebuilders face in climates like DC’s where it’s cold in winter and humid in summer–which side of the wall does the vapor barrier go on?)
Andrew, I know there has been lots of debate about the correct position of the vapor barrier, although all agree that the purpose of the barrier is to ensure moist air never comes into contact with a 55°F cellar wall. I am of the opinion, shared by most, that it should always be on the outside of the cellar walls. I struggle to come up with any situation, in an active cellar, where the science would dictate the barrier be on the inside.
I asked the question because I couldn’t tell from your photos if you had installed a barrier between the block wall and the studs, and I thought maybe you were not planning to put in a barrier at all…that would be a big mistake.
The ceiling barrier is always a problem. I ended up using planks of extruded styrofoam resting on top of a drop ceiling. The styrofoam is both an insulator and a vapor barrier.
Another consideration is the basement floor, bare concrete is not a vapor barrier, and has almost zero R-value, so you may have to think about that too.
Andrew, what part of the country are you in? In other words is the floor going to help or hurt?
Also, are you using spray foam or extruded sheets? If sheets I agree the ceiling will be your biggest challenge. If spray just make sure they don’t fill the entire 2x6 cavity if you don’t need to as it’s expensive and you might not need more than 3 inches.
I live in the Washington, DC area, so the floor is going to be a modest harm in the summer. The floor is about 6 feet below grade. I pulled ground temp data, which I don’t have with me now, but it’s something like 57 +/- 10 degrees at that depth, so in late August it will be spitting out a fair amount of heat. At least I shouldn’t have to worry so much about condensation. I’m considering cork flooring in order to provide some amount of insulation there.
I’m planning to use spray foam. And, yes, if I were putting in poly I screwed up by not putting it on the wall against the blocks. I could probably slide it in there, however.
Good idea to use sprayfoam, I did and saved myself a ton of trouble (though not money). You don’t need poly on that wall since you are using closed cell. Ideally you would have offset the studs an inch or so from the foundation wall so the foam could fill that space.
I’m in Buffalo so don’t have thoughts on the floor. MIne only gets up to the low 60s as far as I can telll from the one summer I have been here. I remember some discussion in other threads about insulating and vapor barrier on floors but don’t remember the consensus.
A 6" poured concrete slab has an R-value of about 0.5, so if the earth is 67°F at the summer peak, you will have approx 1,500 BTU/hr coming in thru the floor (63 sf x 12°F /0.5 = 1,510). A 1" slab of R-5 foam would reduce the heat input to 150 BTU/hr.
This is a useful link http://www.geo4va.vt.edu/A1/A1.htm to help determine earth temperature, and Andrew it looks like your 57 +/- 10 is spot on.
Peter - Are you aware of any foamboard products that can have flooring applied atop them? I’d like to avoid framing up an entire subfloor with 2x4s and plywood. Close to 3" thick that I don’t have.
Spray foam comes in both open and closed cell…you should use closed cell.
Don’t use cork flooring, as you have created a vapor barrier over the concrete potentially causing condensation and mold growth under the flooring. Your best bet is a tiled floor (tile, slate, travertine, etc) set on mud (or thinset if relatively level) so you have a level floor for your racks and the tile will act as a vapor barrier. The additional heat load isn’t significant enough to worry about.
In the course of researching the resistor method of tricking a standard A/C unit (I think some call it the Galli method), I came across this interesting device: http://storeitcold.com/index.php
It appears to operate on basically the same principle–trick the temperature sensor and add in a frost shut-off, while adding a temperature control of its own (rather than trial/error method of different-sized resistors).
Any experiences? The price tag gives me a bit of a pause–the unit looks decent, but it’s probably $20 worth of parts and $30 of labor, so it’s high compensation for the “innovation” involved. Nonetheless, it may be a price worth paying.
Yikes, $300? The Galli method cost me maybe $20 in radio shack parts. Takes a bit of tinkering to get it set at 55 degrees, but the setup is EZ PZ Japaneasy. Just a resistor or two, an AC to DC wall plug, and some electrical tape.
The only drawback is the aesthetic, but my cellar is purely practical. I may think about putting some nice woodwork around it, but I don’t want to impede airflow.
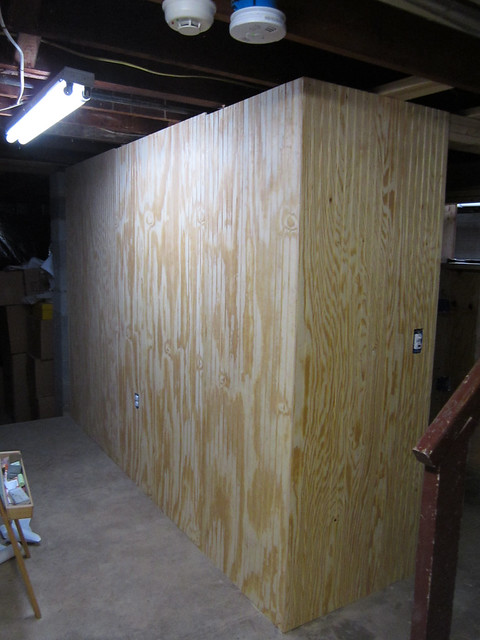
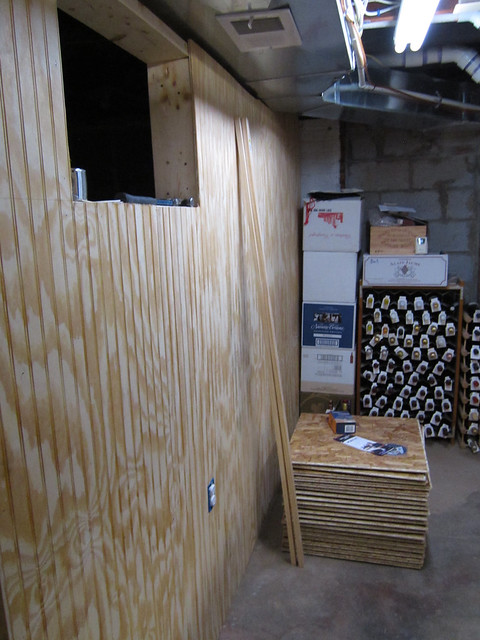
Beadboard paneling for the exterior installed. Came out pretty well–it’s basically 3/8" plywood that’s been milled to look like beadboard. I plan to sand it and paint it at the end, and think it will look pretty good (and fit in with other parts of the house. Sure beats installing T-I-G beadboard. In the second picture, you can see the cutout (or “window”) for the A/C I’ll install. It’s a bit larger than needed in case A/C gets bigger in the future (or I need a bigger unit . . . global warming anyone?)
A view from the inside-that’s the door of course:
And a picture of the light switch for the cellar on the exterior wall. Set up with a illuminated-on pilot light to remind me if I left the light on.
All set for insulation now. Waiting for the spray foam kit to arrive, so that’s the project for next weekend.