![]()
Now THAT brings back memories… I think my door and frame took me a whole week. One day was ripping the door apart because I forgot to put the insulation in on the first try. ![]() Not a great moment as I recall.
Not a great moment as I recall.
Cedar look GREAT!
Ugh. I had to pull apart the frame in order to mortise the hinges. Fortunately I realized that before I had installed it in the door opening. On the good side, I (a) avoided the cost of a $1000+ door and (b) avoided the crappy quality of today’s prehung, hollow-core quasi-wood doors.
Andrew, You bought a spray foam kit?
Just out of curiosity, why didn’t you have a pray foam company just come in and shoot the whole thing? Too Cost prohibitive?
Loving the cellar by the way… As a person that likes to build but wears a suit M-F, it really cool to see this progress.
I did buy a kit. From what I could tell the project was too small for a spray foam contractor to do cost effectively. To be honest, though, I didn’t call around because I didn’t feel like doing all the research on companies. Also, the contractor I had used for the rest of the house suggested getting a kit, even though he’s used spray foam folks for larger projects–he would have said “call X” if he thought it made sense.
There are days when I’d rather not put on the suit and put on the toolbelt instead–today included. Kind of want to finish off the walls. The progress is frustratingly slow when I’m basically doing this on weekends, in between other family obligations. So not much will get done the next couple of weeks . . . Easter and then some other stuff.
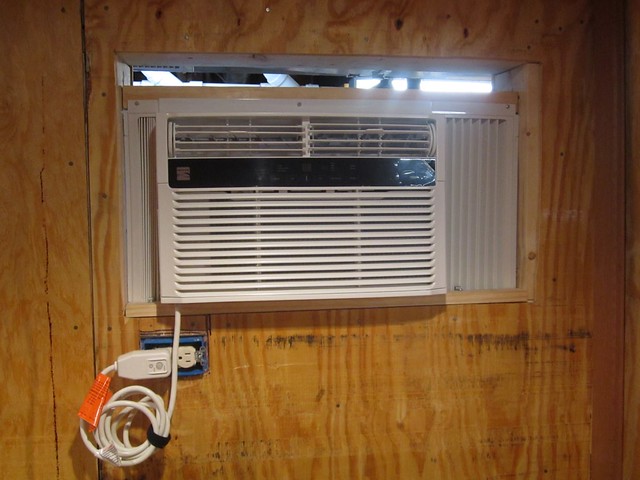
Finally got a chance to start working again. I bought a window AC unit recently to keep things cool. Kenmore 5200BTU, which my calcs show should be ample (based on ambient temps in my basement I’m looking at a need for ~1000 BTU/hr in the worst scenario I’m likely to encounter).
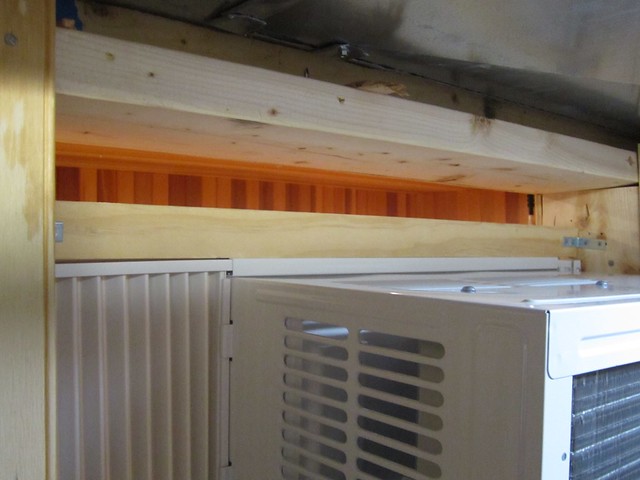
I wanted to install the AC now so I could finish the wall around it and trim it out. Using a window unit is a bit of a challenge in a through-the-wall application. I had already framed out the “window” but these are designed for a sill and a double-hung window, so I had to simulate that. If I did this right (I think I did) I should be able to replace it by taking off only the trim and a couple of screws–but I hope I won’t have to replace it for a while. Anyway, I built a “sill” out of 1x2 at the bottom–that along with a bar on the bottom of the unit keeps the AC from sliding “in” (see the second picture). Then I used more 1x2 along the top of the AC unit to keep it from tipping back and “out” (see the third picture). If the next AC unit is larger or smaller I can adjust the window bar on the top to the right height. And as you can see I have plenty of width and overall room for a much larger unit (global warming?). I’ll get some insulating board to fill the gaps a bit better and hope it’s not a huge energy suck.
I was pleased how much space there is for venting the AC around the unit–I was a bit worried about that, but not now. Also, it doesn’t come out very far into the adjacent part of the basement, so it leaves me more space for other stuff. I’ll be interested to see if any condensation comes off it–I may need a drip pan or find a place to put a pipe, which I can run to the slop sink nearby.
View from inside (wall still needs paneling):
Replacement for windowsill (see board at the bottom, which is a piece of 1x2 going the full width, nailed into the windowframe):

And the fake “window” along the top, held in with L brackets:
A little more work . . . finished the cedar all the way around. On to the floor and trim work (around door, AC, and the ceiling panel, as well as some baseboard and crown to make it look a bit more finished.
Looking out door:

Looking in through door:
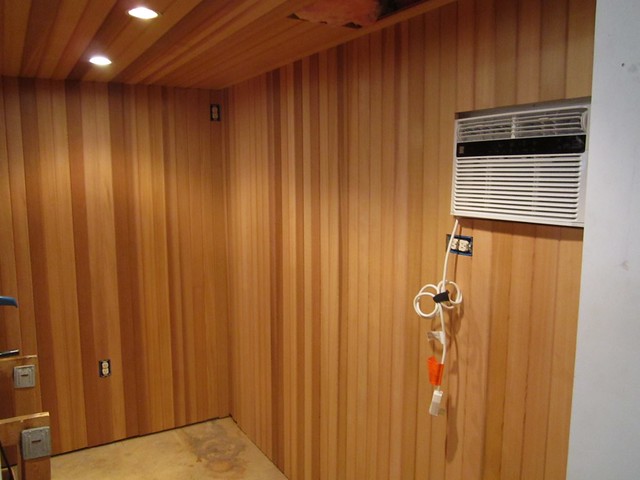
Close up of AC. Guess I should have put the outlet a bit more towards the center. That’s valuable racking space!

Excellent.
As my wife is prone to saying “looks good, you should be finished tomorrow.”
Ha. The projects are stacking up, although to her credit she has not been complaining about either the time it has taken to get done or the time I have devoted to it (although perhaps she recognizes the paradox that if you want something done quickly you’re not going to see much of me).
I had hoped to be closer to done in time for Spring gardening season. At least the rainy weekend meant I couldn’t do stuff outside.
Great thread and very impressive/inspiring. Thanks for sharing.
Nah, it looks like the outlet is directly under the cable - you just need to shorten that power cable to the exact length to the outlet, that will give you max rack space!
Seriously, though, I really like the aesthetic of your cellar; cedar is a great choice both for looks and longevity.
Kudos!
Hey Andrew,
I have another question for you. Will that AC unit go down to 55? Most AC unit’s I’ve seen (and I’ve bought a few, living in older buildings in the past and now again, curently) only go down to 60 degrees.
I’ll have to find a way to get a nice tight coil under the AC to save the space–I’m not wild about cutting appliance cables, but if I get up to max capacity I may have to make a sacrifice.
The setting drops to 60 degrees. I’m going to give it a go with a resistor and power brick to “trick” it to going lower (“the Galli method”?). Fortunately the temperature sensor is right behind the front grill, so I should be able to make a nice clean modification that I can cover up the wire with. Another poster here gave me some great info on doing that. I’ll let everyone know how it goes.
Awesome looking room, nice work
For those of you who can’t bear the week ahead without a cellar update . . . not much tangible progress this week. Just some prepping of materials for further work and some trim detail, as below:
Trim around AC unit. Hope the unit lasts awhile, but if not it will be easy enough to pull this off and replace to fit a new unit. (I’ll fill the nail holes before I put the Danish oil on).

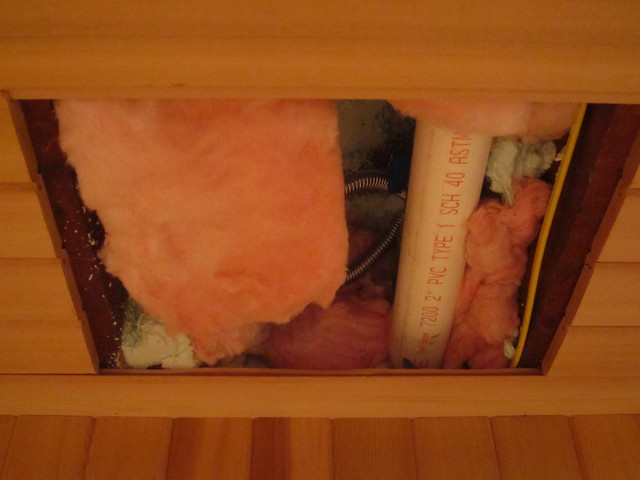
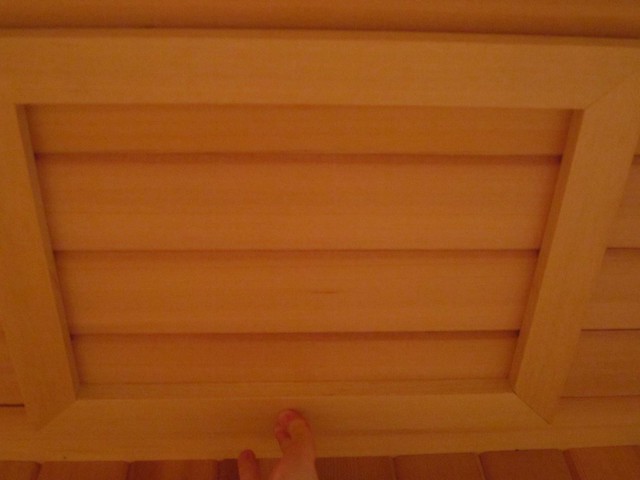
And, the gas shut-off access panel (see the coiled metal hose? That’s the gas line to the stove, and a shutoff switch is in there). I’ll put some cabinet magnets on the inside to hold this up–I don’t plan to stand there 24/7 holding it up, as I did in this demonstration. For those of you who really care about details, I cut the panel pieces out of the boards in the ceiling when I installed the ceiling so that the grain would be more or less continuous. (A touch no one other than I will notice).
Looks great Andrew. Is there any concern that the cedar will be too aromatic? I don’t know if there’s anything to it, but I’ve always heard you want to avoid any strong aromas in a wine cellar.
Larry - I’m not worrying about it. The cedar has a smell, but it’s not aromatic red cedar, which is a different species. I also plan to put a finish on it, which should further limit any aromas. From experience (my parents’ house) the cedar smell will dissipate pretty quickly. The advantage of cedar is that it is highly rot resistant (hence cedar shingles and fences), so less likely to have any problems with that (although if I had enough moisture to cause rot there would be real problems).
And all of this assumes that odors in the air actually would permeate through a cork into the wine . . .
I’ve heard that cork can allow breathing and stories of wines stored in a basement exposed to stronger fumes (oil paints) getting ruined. All anecdotal and second-hand though. It sounds like your cedar should be fine. Looks gorgeous BTW.
We did ours in redwood (f’ing expensive but only a small cellar 3’x3’)
I’ll report back in 30 years and let you know if my wines have acquired cedar notes. ![]()
I was thinking about redwood as well, but the lumber yard told me it was even more expensive that cedar. ![]()
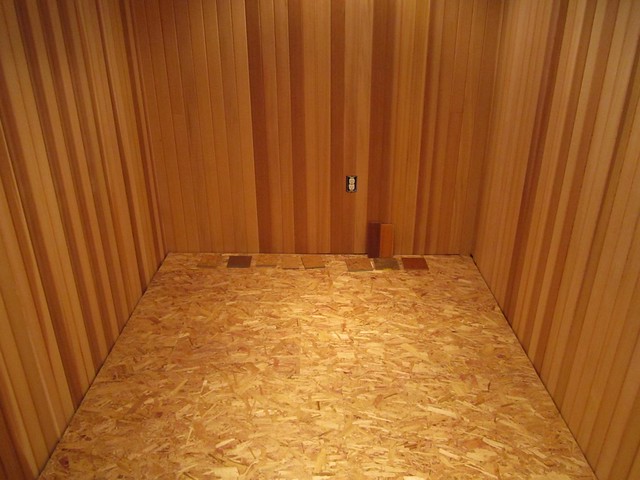
This weekend: subflooring. I used a product called Dricore (no affiliation), which acts as a vapor retarder and a subfloor. All it is is OSB with a plastic textured bottom. In theory, any moisture has a bit of air space to evaporate out through the sides, where one has to leave 1/4" of airspace next to the wall. I don’t have a moisture problem in my basement, so I used it more because it adds R-value (1.7 I think they claim) and is better than the bare concrete. It also smooths out the imperfections–I was a bit worried that the unevenness in the floor would require some shims, but it seems like not–they must have been small enough. There’s another product like it called Barricade, made by Ovrx–it actually looked a bit better suited to my needs–higher R-value of 3.2–but I couldn’t locate it in a store near me. Anyway, both are options worth considering for basement wine cellars.
I plan to put real flooring on top of it (samples in one picture), but if one didn’t care about the look it could easily be used as the actual floor. One might want to sand it a bit and put a finish on, because it’s a bit rough, but it would do okay even without. Installation was very easy. It’s tongue in groove and they lock into place with a hammer and block of wood. The last pieces are a bit of challenge because you have to use a prybar to get them in place. But this bit of work took less than two hours, even having to cut two pieces for each row. If you had a bigger space it would go a lot faster per piece.